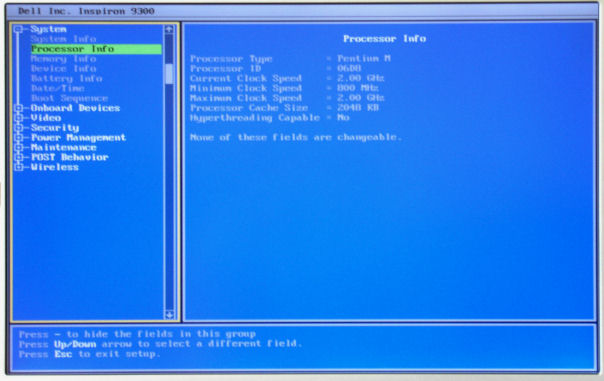
I got a new Inspiron 9300 yesterday and had a P-M 715 running at 2GHz in my old 9300. I didn’t document it before, but since I had 2 9300s opened, here’s a guide to doing the 400MHz->533MHz mod. I recommend having a large, flat area to work in and be sure to keep track of all the screws! It took me about 20 minutes for the upgrade both times I performed it. YMMV
Preparation
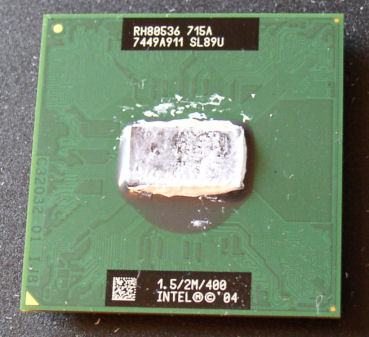
STEP 0: Acquire a 400MHz FSB Pentium-M. A Dothan will give the best results, but a Banias core Pentium M might also work. I haven’t tried overclocking a Banias CPU, so YMMV. Ignore the too much paste on the CPU.
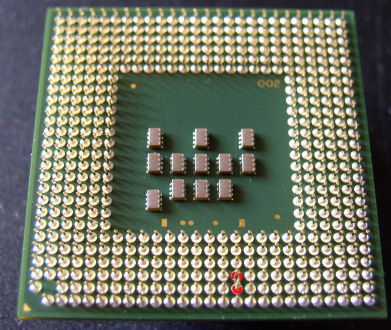
STEP 1: Short BSEL0 and ground. Do that by shorting the 2 red pins together. The wire above is wrapped around both pins twice and bent inwards between the 2 to secure it. Fear my mad wire handling skillz. You could also drop a U shaped wire into the socket like ziddey did. I wouldn’t do that, but it’s probably easier for most than wrapping a strand of wire around 2 pins. 
Disassembly
STEP 2: Bottom screw removal. Remove the battery and set it aside. Remove the 13 screws holding the bottom of the case to the top half. Yes, all 13 are necessary. I removed the hard drive, but it’s not necessary. I was using Ghost to move my installation over at the time.
STEP 3: Top plate removal. Flip the computer over and open the LCD until it’s flat (open 180 degrees). The plate above the keyboard pops up from the right. Use a flat screwdriver to open it. I recommend padding the screwdriver tip with paper so you don’t make gouges.
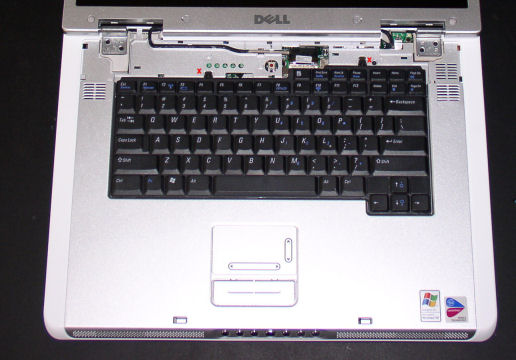
STEP 4: Keyboard removal. Remove the 2 screws maked above. Lift the top of the keyboard gently while pulling it away from the touchpad end. There is a small ribbon cable with a plastic loop. Disconnect the keyboard from the laptop motherboard.
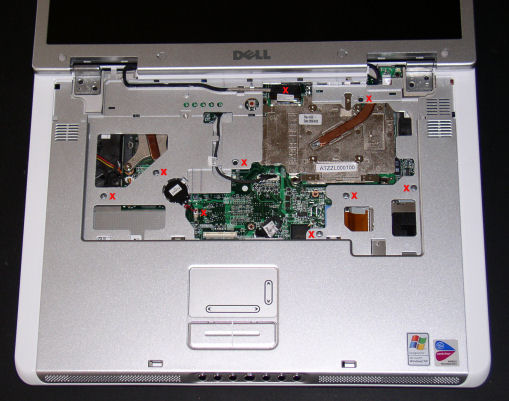
STEP 5: Remove more screws. Remove the 7 screws that hold the top to the bottom half of the case, LCD cable and LiIon battery cable as marked. The 2 halves of the case will separate with little pressure. If the case is stuck, you probably missed a screw from step 2 or step 5. The case will not come completely apart because…
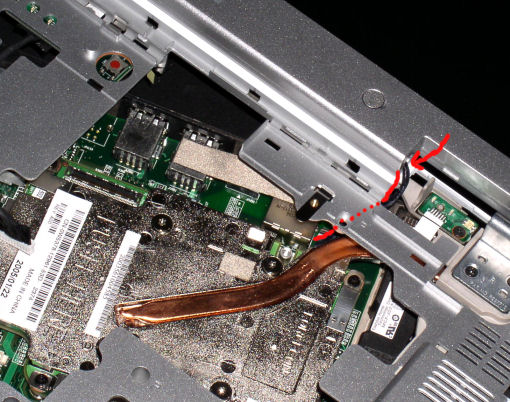
this short cable will make your life a little tough. It goes beneath the motherboard. It’s easier to shift the 2 halves of the case to remove the screws in the next steps than it is to fully disassemble the laptop.
STEP 6: Remove the CPU heatpipe. Remove the 4 screws by the X above. One is hidden in the picture, but you should figure it out. The heatpipe lifts straight up. Put it aside
STEP 7: Unlock the CPU. Twist the slot in the socket as shown on the diagram on the socket itself. The CPU comes out easily. Goodbye 1.6GHz/533MHz CPU.
STEP 8: CPU removed. That’s all for disassembly.
A neat collection of parts.
Reassembly
Reassembly is of course just disassembly in reverse. You can test it after you put the CPU and heatpipe back in, but be careful with the open case.
Result