December 17th, 2008 by James | This article was viewed 41,225 times.
Last week I was irritated by the pace of my Dell Inspiron 6400/E1505 Laptop’s ability to play movies in High Definition. It lagged at 20 minutes after the movie started and I was pissed off. So I decided to disassemble my Dell Inspiron 6400 to clean it once and for all!
This “How To” guide will provide a step by step guide to Dismantle your Dell Inspiron 6400/E1505 Laptop.
READ ME
This guide is made just to show you a step by step sequence on how to disassemble your Dell Inspiron 6400/E1505. Advices taken here are taken at your own risk. AhWee.com take no responsibility if you break any of the hardware and lose your warranty.
NOTE: Even though Dell said disassembling yourself would lose your warranty, but I have not torn any warranty paper since I last dismantle. So, do it at your own risk.
Tools You Need For Dismantling
- Philips Screwdriver (around 2.5 mm will do)
- Flat Blade Screwdriver
Before You Start
Please note that before you start to unscrew anything, make sure there are no power connections to the laptop. Your battery is the main source of power, so it’s wise to remove the battery.
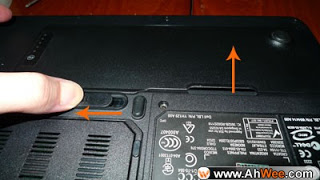
How to remove battery on a Dell Inspiron 6400?
- Push the battery latch to the left.
- Lift the battery out from it’s compartment.
NOTE: You will also need quite a big space to put all the components you want to disassemble, so clear out your table before starting. Also, get yourself a small container to put all the screws because there are more than 15 screws to take out when disassembling.
Now ground yourself and your Dell Inspiron 6400’s motherboard to avoid any electrostatic discharge. To ground yourself, simply wear a wrist grounding strap or touching an unpainted metal surface from time to time. Press the power button to ground the motherboard.
Step 1: Remove The Harddisk
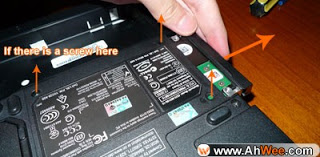
The harddisk is located just next to the battery. To remove your harddisk on a Dell Inspiron 6400,
- There are two screws M3×3mm screws you will need to unscrew.
- Apply some force and push the harddisk out from its bay.
NOTE: Step 1 is not really needed but because the harddisks are fragile things. I recommend removing it before tampering with other stuff. Also store the harddisk in an antistatic bag to protect it against electrostatic discharge.
Step 2: Remove The Optical Drive
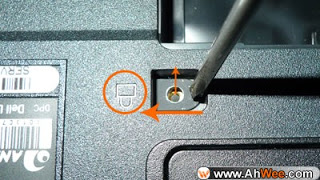
Your optical drive (CDROM) is located just at the opposite of the harddisk. To remove it,
- Unscrew the screw that has a packlock icon just beside it. (Only 1 screw)
- You will see a metal slab after the screw is taken out.
- Push the metal slab with your screw driver and pull
the optical drive from the other side.
Step 3: Remove The Hinge Cover
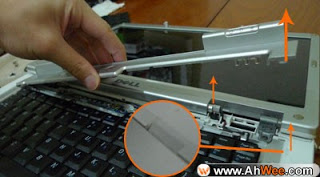
This is the hard part. Even after a few times of disassembling my Dell Inspiron 6400, I still have difficulties removing the Hinge Cover because the plastic cover is just too fragile. But it does not mean it is impossible to remove.
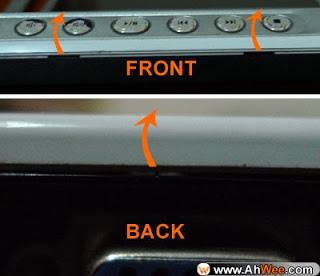
- Push the LCD screen downwards so that it is aligned with your keyboard.
- Notice the small indentation on the right side of the palm rest.
- Use your flat bladed screwdriver to slowly (and gently) pry open the hinge cover.
- The hinge cover is connected right up to the part where the monitor is connected to the base of the laptop. You might also want to try to lift the hinge cover from there.
Step 4: Remove The Keyboard
Of course, you have come so far, you can see the screws that are keeping the LCD screen intact. You want to take the LCD screen off as soon as possible. But keep in mind that the keyboard are covering some of the wires. To remove the keyboard,
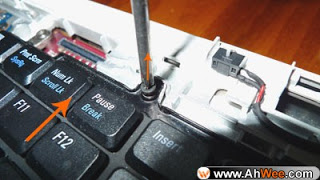
- Unscrew two M2.5 x 5mm (smaller) screws that connects the keyboard to the base.
- Use your flat bladed screwdriver to push the keyboard forward (to the direction of the LCD).
- You might also want to try to lift the keyboard up from one of the tabs located at the left side of the “Escape Button”.
- Take extreme note here. Your keyboard is connected to the motherboard via a very thin cable. Gently rotate the keyboard so that you can have access to the cable slot.
- Unclip the keyboard cable then only you can pull the cable out of the slot.
Step 5: Remove The LCD Screen
Now the fun part.
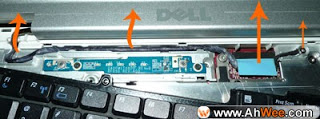
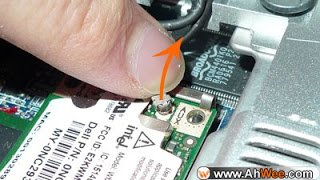
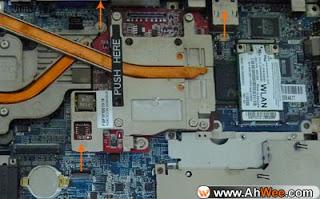
- There are 2 antenna cables and a display cable connected to a ground wire to disconnect from the motherboard.
- Just apply some force to disconnect the antenna cables out from the Mini-Card.
- Loosen the ground wire and disconnect the display cable using the tab.
- Unscrew two M2.5 x 8mm screws at the bottom of the laptop.
- Unscrew two M2.5 x 8mm screws at the back of the laptop.
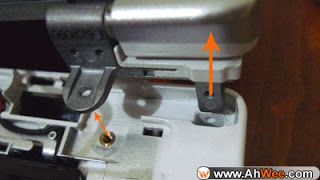
- Unscrew two M2.5 x 5mm screws that connect the LCD screen to the base of the laptop.
NOTE: Take extreme care of the standby switch (white colored, located just around the antenna cables. They are so thin that I suspect it would be easily broken.
Step 6: Remove The Palm Rest
If you are disassembling your Dell Inspiron 6400 laptop for the first time, this is the hardest part. The Palm Rest is very tightly clamped to the base, making it nearly impossible very hard to lift the palm rest for the first time. It’s just like a girl losing their virginity for the first time I suppose, and her name is “Dell Insipron 6400″.
I personally think this is the hardest part because I myself spent about 5 freaking hours trying to figure out how to dismantle the damned palm rest. The polymer (I assume they are) used to make the laptop can be bent for quite a margin which scares me because if I bend it more, it would definitely break. So, don’t try to bend anything when you’re removing the palm rest.
But the next time you disassemble your laptop, this will be the easiest part. Like I said, like girls losing their virginity for the first time.
- Unscrew the remaining 11 M2.5 x 8mm screws located at the bottom of the laptop.
- After that, you might want to take a look at the area where your “Power Button” is located, there’s a black screw located right at the bottom of it. Loosen the screw. NOTE: You can’t take the screw out so don’t bother trying with any magnetic screwdrivers.
- There are two cables you will need to disconnect here. One is the standby switch cable and another blue one (touch pad cable) located beside the coin sized battery. Use the same method you used to disconnect the keyboard.
- Now the hard part (if you’re dismantling for the first time). The 4 corners of the palm rest should be wobbling right now, ignore them. What you need to focus here are the center parts of the palm rest, which is clipped to the base.
- There are two clips that are very tightly clipped so you need to pry it open with a flat bladed screwdriver. A loud crack confirms that the clip is broken you have successfully unclipped the palm rest.
- Do the same thing for the clip on the front.
There you go, your Dell Inspiron 6400 laptop disassembled. Take extreme care from here onwards. Clean whatever that is necessary, don’t apply force on area you think you shouldn’t touch.
I captured a few videos, but they were captured from the wrong angle. So we will just have to wait until I disassemble my Dell Inspiron 6400 next time for the video.
I hope this guide would help anybody who wants to disassemble their Dell Inspiron 6400 for cleaning or etc. Do leave some comments if I left any steps out. Happy Disassembling!
UPDATE: If you have difficulties disassembling your laptop, I would gladly help you out, Free. The idea is not to break your components. Contact me and we’ll discuss the details.
Additional guides relating to disassembling Dell Inspiron 6400/E1505


