This tutorial is for those who wish to fix their Dell Inspiron x300/300m loose hinge problem.
(last updated March 12, 2007 by VK2K)
After using this awesome laptop for over 3years my LCD screen went flop splat on me. It became useless as the LCD couldn’t hold upright. As many have figured out… calling Dell for replacement part was pointless. Dell required that you purchase the whole LCD screen to get the hinge replacement. Replacement hinges online was all out of stock and ebay was charging like crazy for that damn thing! (over 100 bucks)
Googling around people were posting that the hinge can not be tighten and replacement was the only option. I was about to give up on the laptop and just rip it apart making a DIY projector using the lcd screen and laptop base. I just happen to stumble upon a page from a guy that had the exact same laptop and exact same floopy whoopy loose hinge problem. [link] This tutorial below is based on his attempts. All credit goes to him. I just have provided higher resolution step-by-step photos for the process! It is possible to repair loose hinges!
Step #1 : Remove Hinge Cover
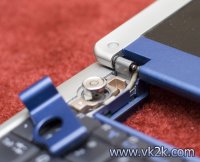
There are two hinge cover on the left and right side of the LCD. It hides and protects the screws n stuff.
Gently pry then off. I found it was easiest prying it off starting from the top, and it just pops off.
Step #2 : Remove Screw From Base
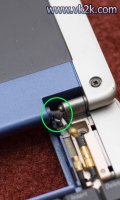
With the hinge cover removed, we now remove the screw right under the hinge. Do so for both sides.
Look at the green circles on the photo…These are the screws to remove.
Step #3 : Remove Screw From Bottom Base
The last two screws to remove is the one at the underside of the base. Look at photo to see where it is.
Step #4 : Remove LCD From Laptop & Remove Hinge From LCD
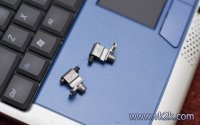
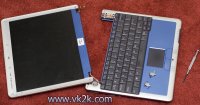
With the 4 screws removed, the LCD should easily be separated from the Laptop base. You don’t have to unplug the video cable from the LCD. Now carefully pull the hinge away from its socket. This part might be little tricky, but keep wiggling it out. The LCD video/power cable might be in the way, but bend it slightly to give room.
Step #5 : Hammer in the Hinge
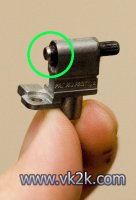
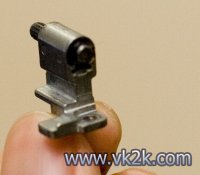
Notice the first photo, circled in green, the hinge is protuding out slightly. It is not suppose to be out like that.
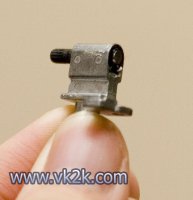
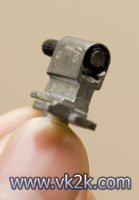
Look at the last photo where it was hammered back in.
Get some pliers or something to hold the hinge with and hammer lightly at the hinge. Do so for both hinges.
Step #6 : You are done
Put the hinge back in, screw the screws and snap the hinge cover back on. You are done.
The LCD hinge once again stays up thanks to the restored friction!


